As a business owner, using the right tools to manage your finances, process payments, and access credit can be key for your business growth and expansion.
But before you can explore all of Earnipay’s features and benefits, it’s essential to verify your Earnipay business account. Here’s a simple, straightforward guide to help verify your account quickly.
Step 1: Gather Your Documents
Ensure you have the following documents ready to make the Earnipay verification process smoother:
- Certificate of Incorporation: Your official registration document.
- Proof of Business Address: A recent utility bill or, from commercial banks only, a bank statement showing your business address.
- Valid IDs for Business Directors: A government-issued ID for at least two directors (only one ID is needed if the company has one director).
- Bank Verification Number (BVN): BVNs for each director to confirm their identities.
- Social Media and Website Links (Optional): Your business’s website or social media profiles.
Step 2: Log In to Your Earnipay Business Account
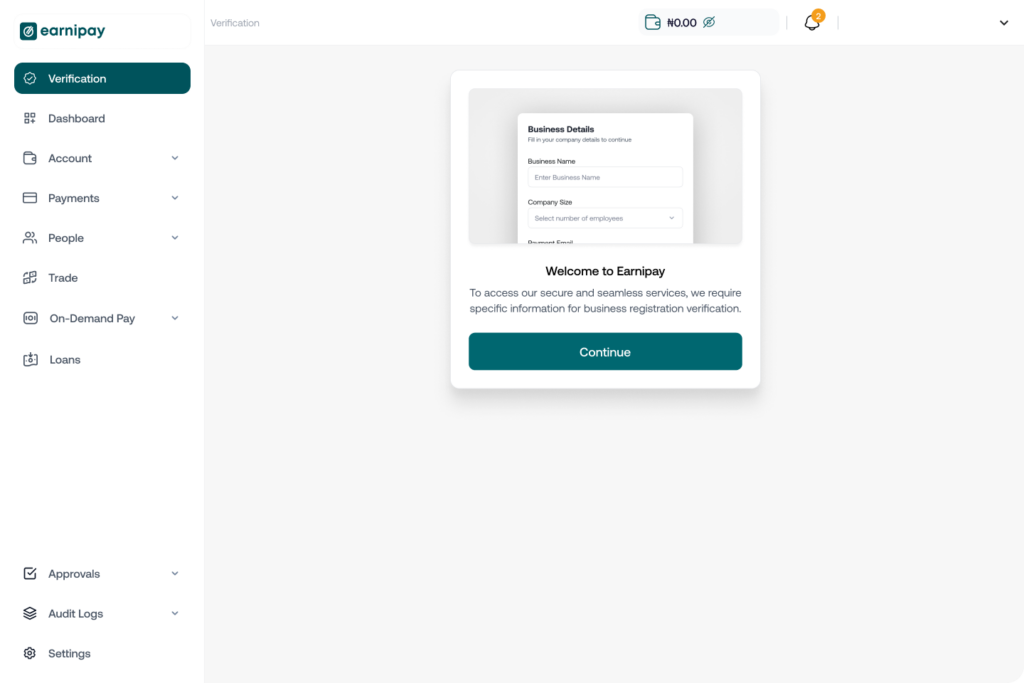
Log in to your Earnipay business account using your credentials. You’ll be guided through each verification step, starting with a welcome screen.
Click Continue to proceed.
Step 3: Complete Basic Business Information
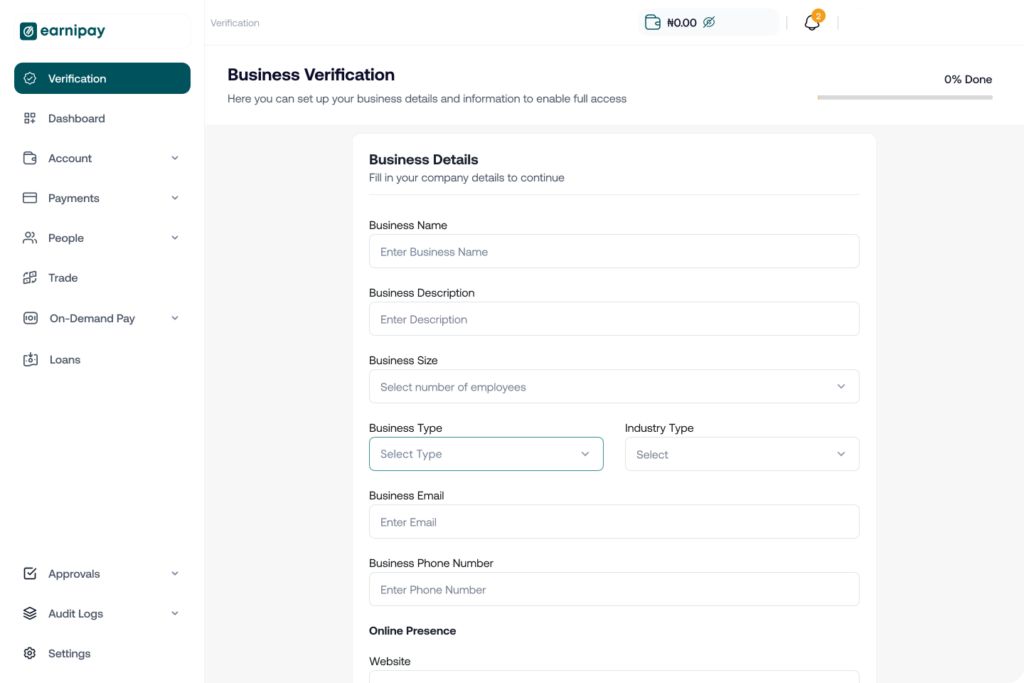
Once logged in and you’ve clicked Continue, you’ll be prompted to enter key details about your business:
- Business Name: Enter your registered business name.
- Business Description: Briefly describe your business and its activities.
- Business Size: Indicate the size of your business, such as the number of employees or revenue range.
- Business and Industry Type: Select the industry your business operates within.
- Business Email Address: Add your official business email.
- Business Phone Number: Provide your main contact number.
- Website Link (Optional): Include your website URL, if available.
- Social Media Links (Optional): Add links to your business’s social profiles, like LinkedIn, Facebook, or Twitter.
Click Continue when done.
Step 4: Verify Your Business Details
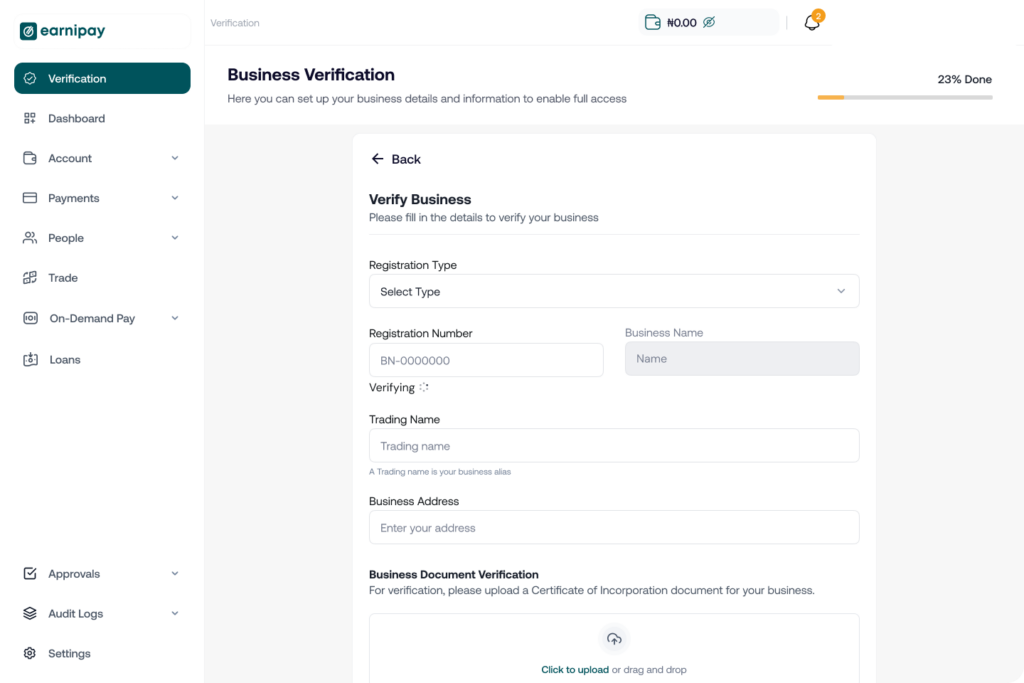
In this step, confirm your business’s registration information:
- Registration Type: Select your business type (e.g., LLC, Partnership).
- Registration Number: Enter your official business registration number.
- Business Name: Confirm your registered business name.
- Trading Name: If different from the registered name, input your trading name.
- Business Address: Provide your business’s registered address.
- Business Document Verification: Upload your official registration documents (e.g., CAC certificate for Nigerian businesses).
- Proof of Business Address: Upload a utility bill or bank statement for address verification.
Click Continue to proceed.
Step 5: Verify Business Directors
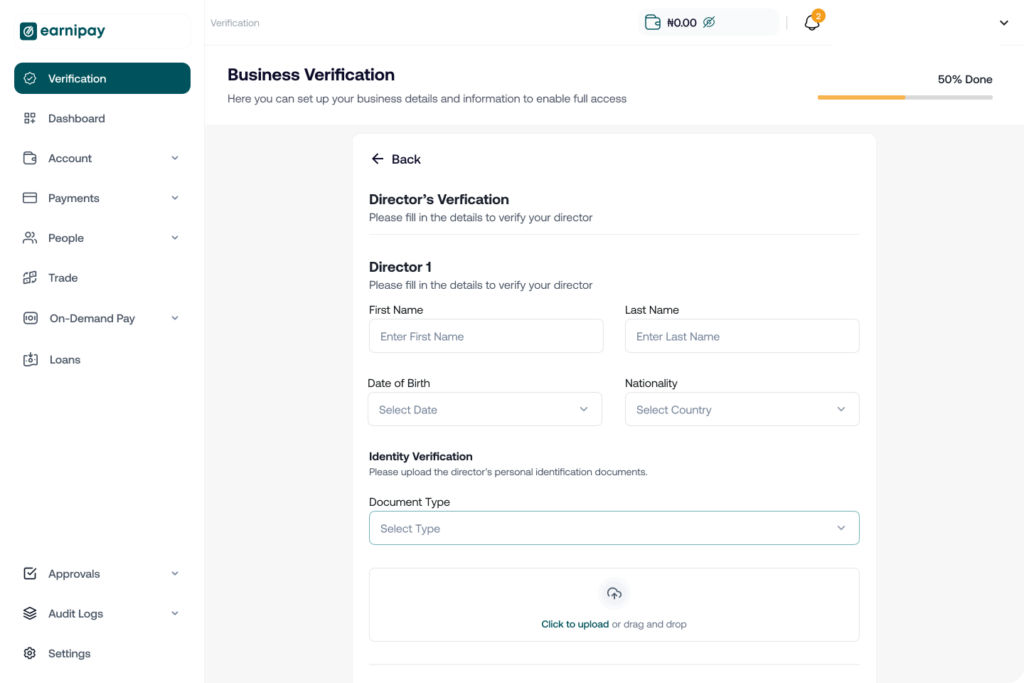
Provide information for at least two directors:
- Director’s First and Last Name
- Date of Birth
- Nationality
- Identity Verification: Upload a valid ID, such as a National ID or Passport.
- Director’s BVN: Input each director’s BVN for identity verification.
For businesses with more than two directors, select Add Director to enter additional details.
Step 6: Submit Your Verification
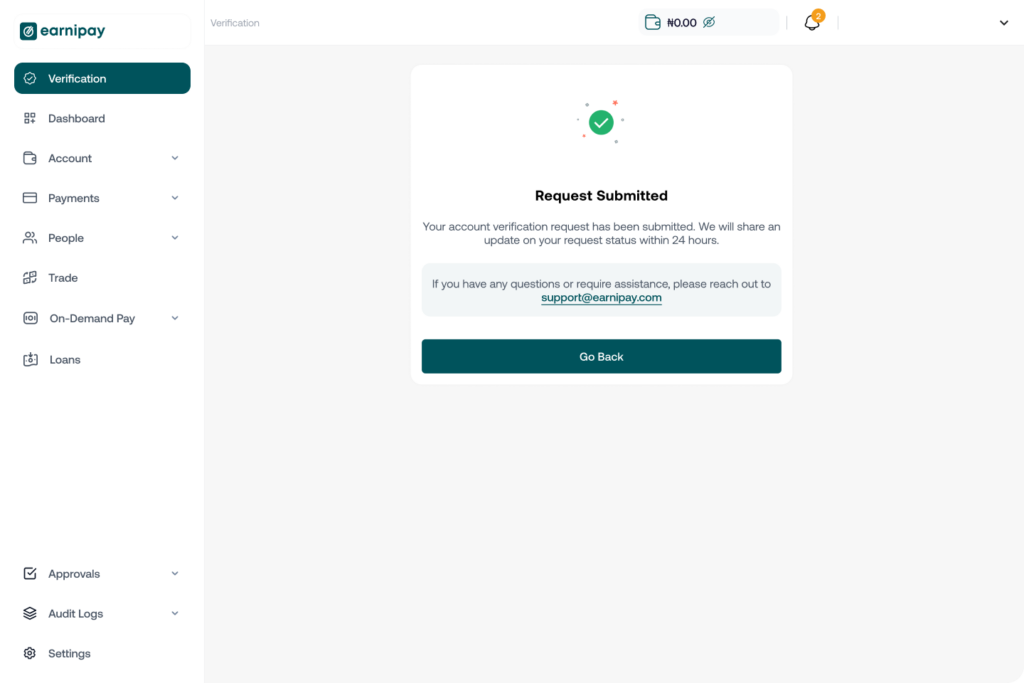
After completing all the steps, click Submit.
The Earnipay compliance team will review your details, and your submission will be processed within 24–48 hours.
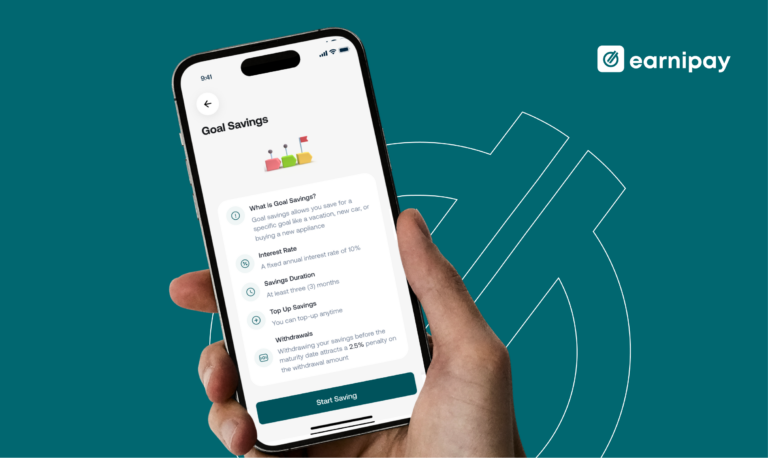
Not only can you manage your business seamlessly on Earnipay, but you can also enjoy personal perks through the Earnipay app. The Earnipay App offers a lot of benefits, including personal loans, up to 15% interest on your savings, discounts on bills, and so much more.
Ready to get started? Click here for a step-by-step guide on how to open your Earnipay account.
Need Help?
For further guidance, visit the Help Centre or check our tutorials. For more details, email us at business@earnipay.com, or for direct assistance, reach us at support@earnipay.com.



Leave a Comment