If you’re here, then it’s a sign you’re ready to go beyond financial limits and start living the life you deserve. You’re ready to do more for yourself; upgrading your gadgets, booking that long-awaited vacation, or investing in some luxury.
Here’s a quick and easy guide to accessing your Earnipay personal loan for the better life you’ve been dreaming of.
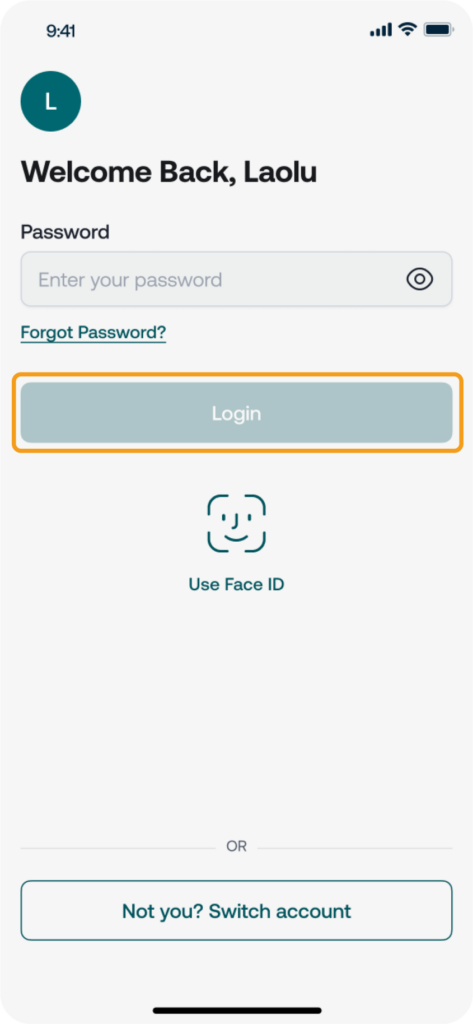
Step 1: Log In to Your Earnipay Account
Start by opening the Earnipay app on your phone. Enter your login details, and you’re in
If you do not have an account, you can go ahead to create one.
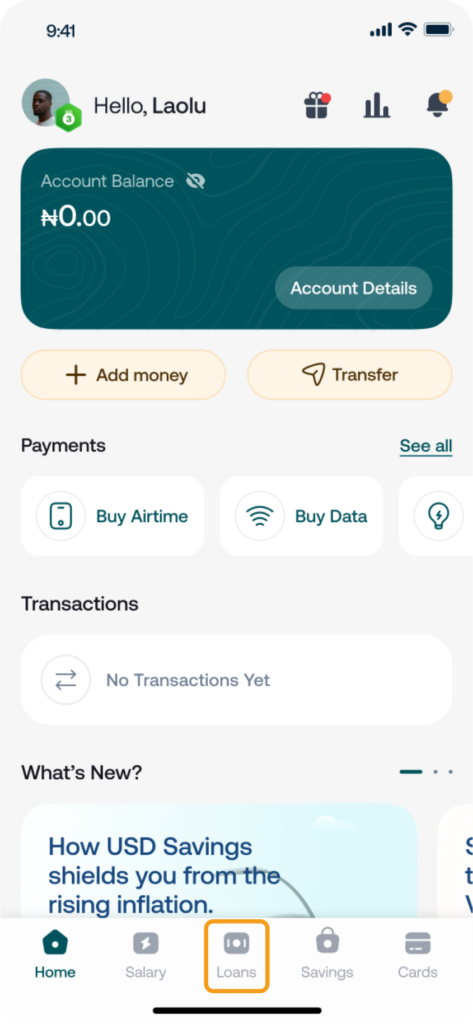
Step 2: Navigate to the Loan Section
Look at the bottom of your screen and tap on the ‘Loan’ menu.
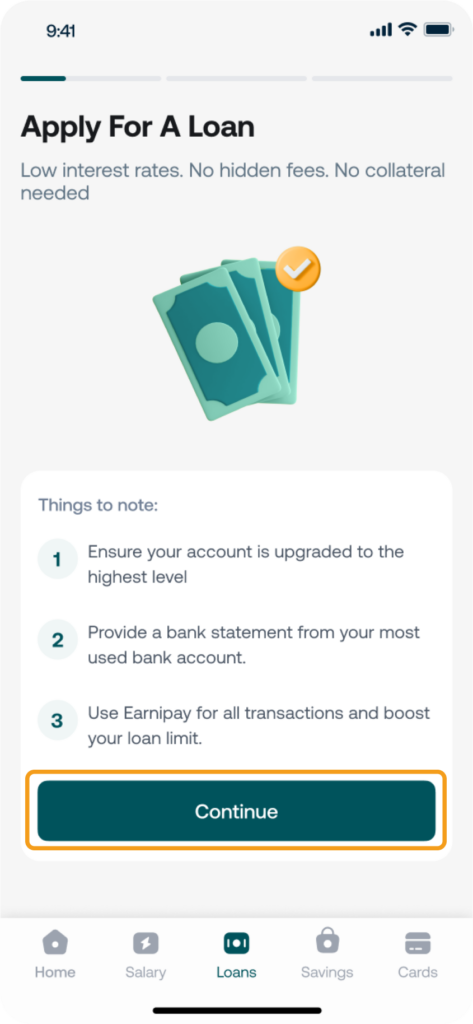
Step 3: Read the Welcome Note
You’ll see a brief welcome note explaining how Earnipay Loans work. Tap on the screen to view more details, and once you’re done, simply select “Continue.”
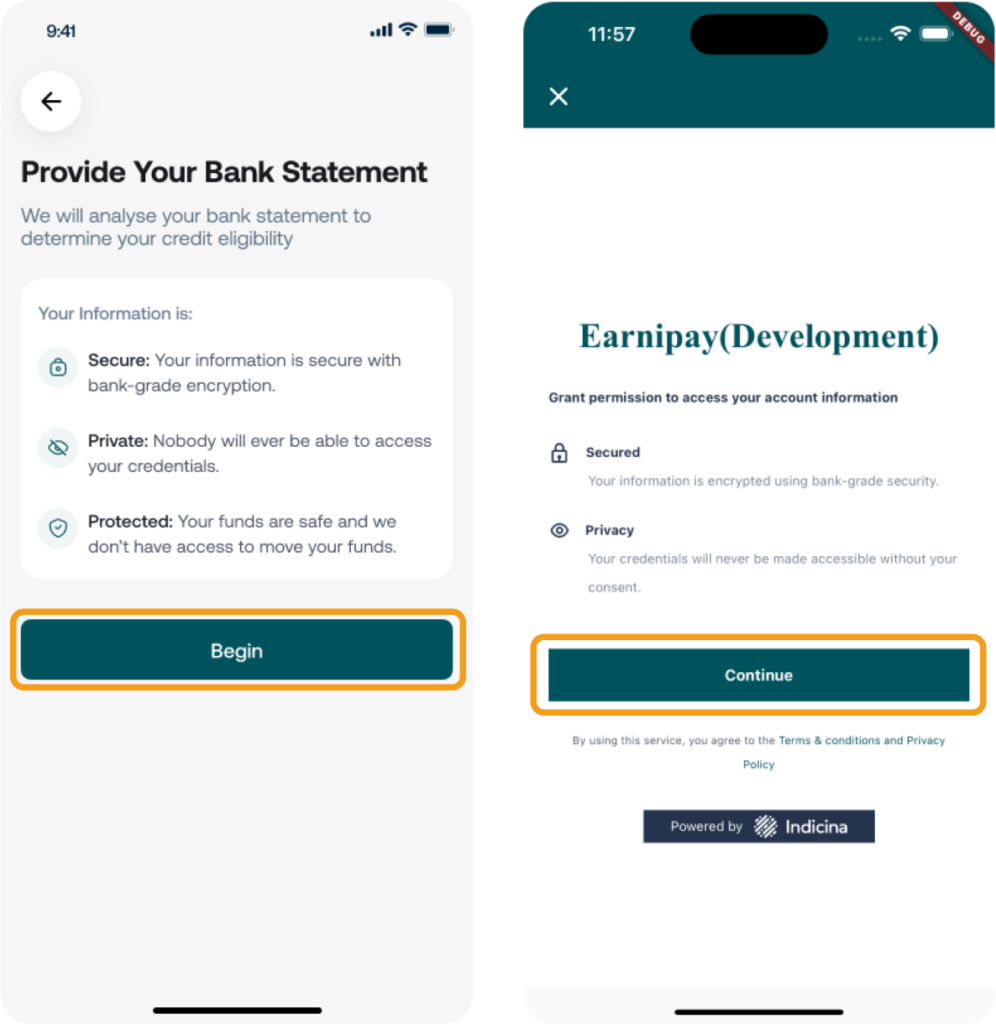
Step 4: Grant Earnipay Consent to Access Your Bank Statement
This step helps us assess your loan eligibility by securely gathering only the essentials: your name, account number, and phone number.
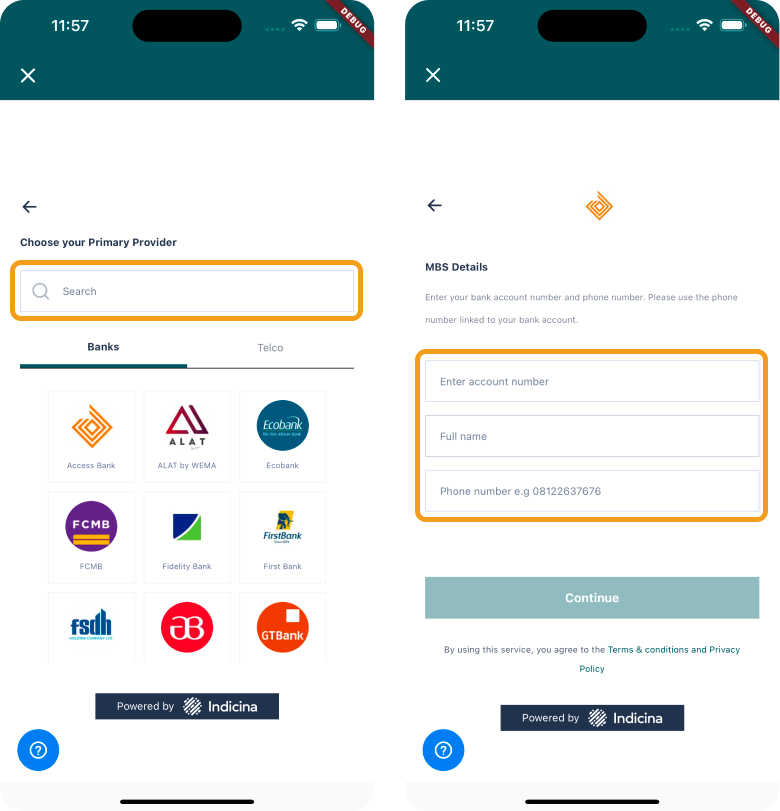
Step 5: Select Your Primary Bank
Enter your main bank’s details—your full name, account number, and phone number, then click on continue. Accurate information helps ensure a smooth approval process for your personal loan.
Step 6: Verify Your Identity
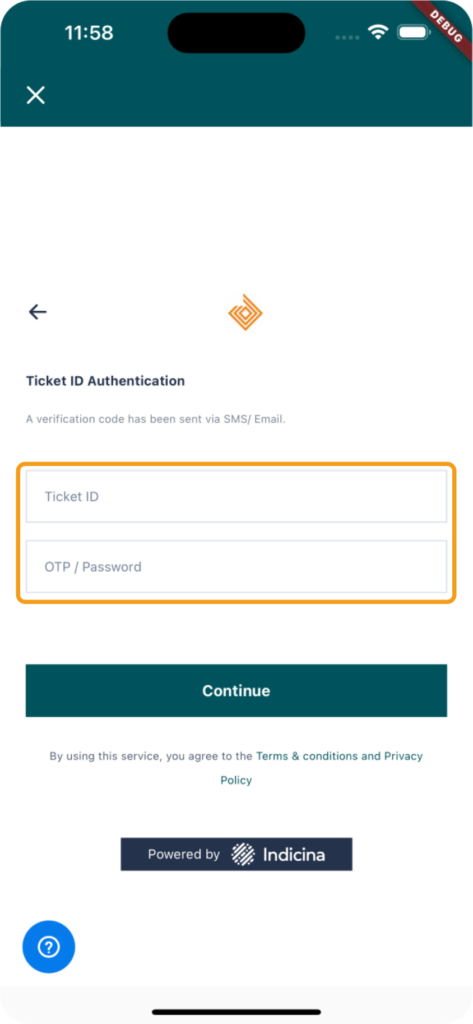
You’ll receive a Ticket ID and OTP on your phone. Enter both into the app to verify your identity, then click on continue.
Step 7: View Your Loan Limit
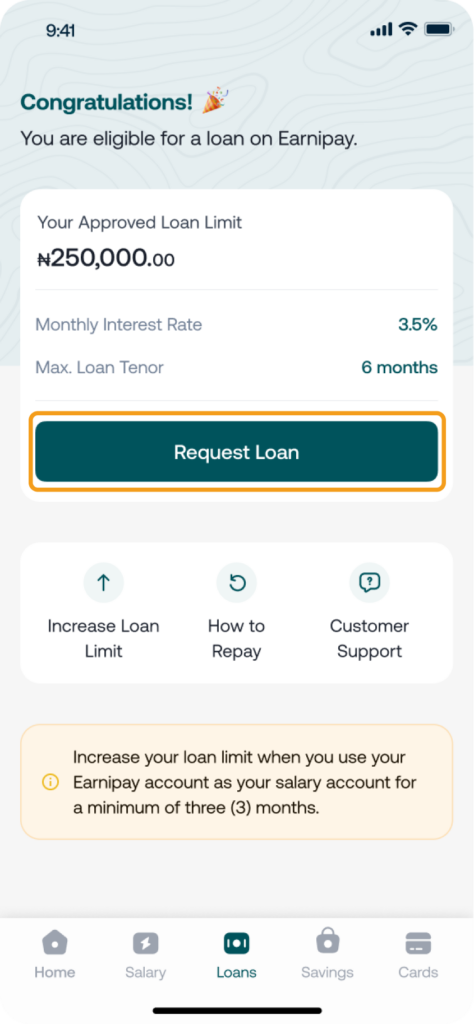
Once completed, the app will calculate your loan limit within 6 hours based on your details. You can then choose your desired loan amount and review the repayment terms.
Step 8: Request Your Loan Amount
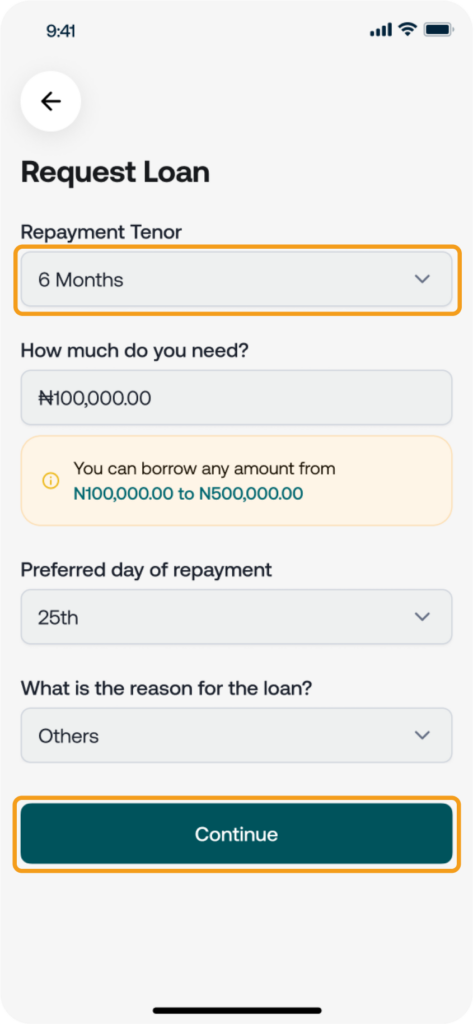
Choose the loan amount you need within your approved limit, then submit your request.
Please note that if you require a higher loan amount, you’ll need to select a longer repayment tenor. The higher the amount, the longer the repayment period.
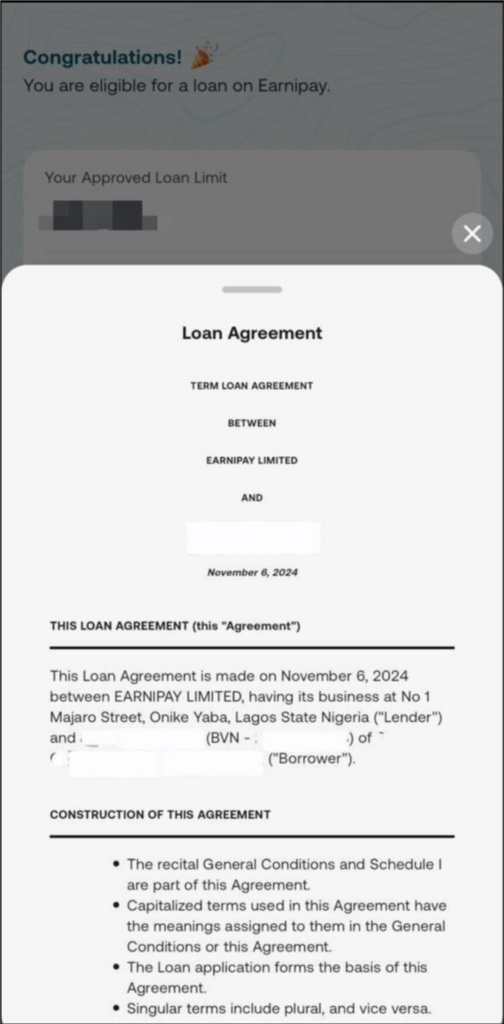
Step 9: Review the Loan Terms and Conditions
Carefully review the loan terms and conditions. If you agree, simply check the box to proceed.
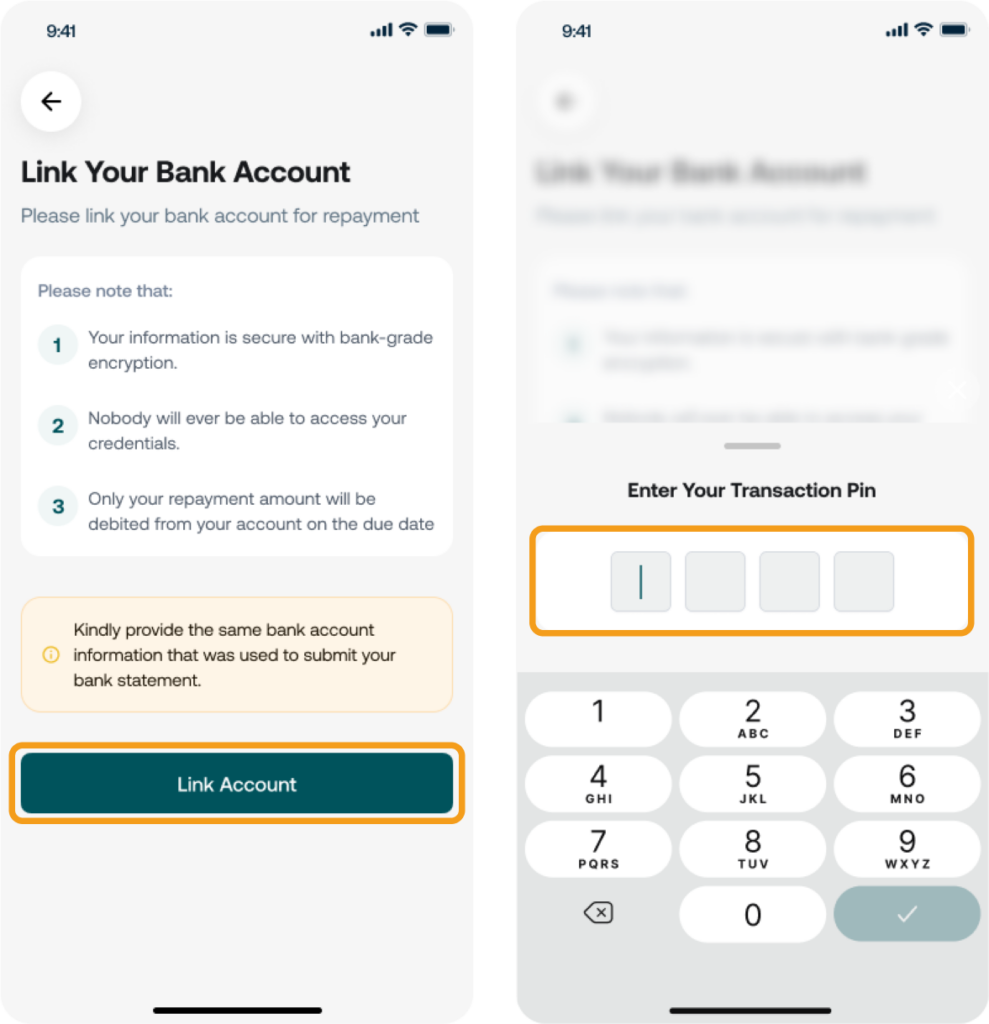
Step 10: Link your account
Link the bank account you originally provided to allow automatic loan repayments from that account.
By linking, you’re confirming that payments will be debited directly from this account, making repayment simple and direct.
Step 11: Your Loan Drops into your Earnipay Account
Yaay! Your loan amount is deposited into your Earnipay account.
And that’s a wrap!
Please Note that the loan limit process only needs to be completed once every 3 months. During that period, you’re free to request and repay your loan as often as you like.
After 3 months, you’ll have the option to request a new loan limit if you’d like a change or if your initial request was declined.
Also, If you own a business, Earnipay offers loans tailored for the growth of businesses like yours.
To find out how to get started on Earnipay Business and get your business verified, read here.
Now you’ve got a simple, fast way to get the funds you need. No more worries, just quick access to cash, right when you need it.
Need Help?
If you need assistance or have questions about getting a loan on Earnipay, our support team is here for you. Simply click here, or email us at support@earnipay.com—we’re happy to assist.



Leave a Comment